Follow these steps to download and install the RDK image
The binary images are for development purposes only and not to be used in a production environment.
Step 1: Verify Account Access
- Your company must be an RDK Licensee to download the image. Please confirm that your company is an RDK Licensee.
- You must have an active Wiki user account. If you do not have a user account, please request one. If you forgot your password,
please click here. - Click the LOGIN button below, which will open the wiki login in a new tab. After successful login, please return to this tab and refresh the page. The RDK image will then be visible for you to download.
Login
Check your username/password
Sorry those credentials are not valid
Sorry You are not a Licensee
Something went wrong. Please try again later
You are currently logged in.
Step 2: Download the RDK Image
Step 3: Flash the image from your computer to an SD card
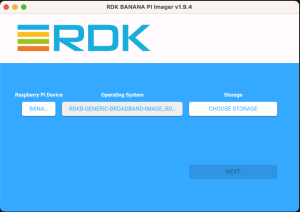
- To flash the image on an SD card, you will need to download our new RDK Imager tool found here.
*Note: Be sure to remove all other portable flash drives/hard drives/SD cards from your computer before flashing the RDK image
- Open the application
- Select the image file
- Select the drive containing your SD card
- Click “Next” to flask the image to your SD card
- For more information please consult the “Quick Guide” found here
Step 4: Install SD Card and Connect Your Device
- Insert the SD card into the microSD card slot on the front of your Banana Pi.

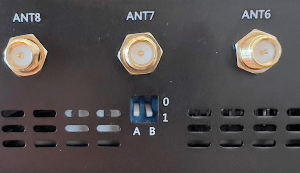
- Ensure the toggle switch on the side is fully in the A1/B1 position as seen in the Quick Guide.
- Plug the included power supply into a socket and connect it to your Banana Pi’s power port (or USB-C port). An LED light indicates that the Banana Pi is connected to power and is booting.
